

What if your kitchen’s tired cabinets could become a luxury focal point without tearing out the room? Professional cabinet veneer installation can give sound cabinet boxes a refined, like-new finish, but durability depends on more than the veneer itself. Careful surface preparation, precise fitting, and suitable materials help prevent visible seams and premature peeling.
It’s reasonable to be cautious. DIY kits can appear straightforward, but a clean, lasting result takes skill and the right tools. Unlike a full kitchen tear-out, cabinet refacing can update the look while keeping the existing cabinet structure in place, which may mean less disruption at home.
This guide explains how professional veneer installation works, how to compare it with a basic kit, and what to ask about materials, adhesion, workmanship, and warranty coverage. You’ll also learn how to assess whether your cabinets are good candidates for refacing and how a considered finish can make a kitchen feel architectural rather than merely refreshed. Delmar Kitchen Pro serves homeowners in San Diego, Encinitas, Rancho Santa Fe, La Jolla, and Del Mar with cabinet refacing and painting, alongside luxury kitchen design and construction.
Key Takeaways
- Learn how genuine wood veneer differs from laminate and what to look for in a refined cabinet finish.
- Consider how coastal conditions around San Diego may affect material and adhesive choices when selecting finishes.
- Understand why sound cabinet boxes and thorough cleaning are essential foundations for a durable refacing project.
- Compare pressure-sensitive adhesive and contact cement to understand the precision involved in cabinet veneer installation.
- Find out what to ask about contractor credentials, workmanship, and warranty coverage before choosing a professional refacing project.
What is Cabinet Veneer Installation in High-End Refacing?
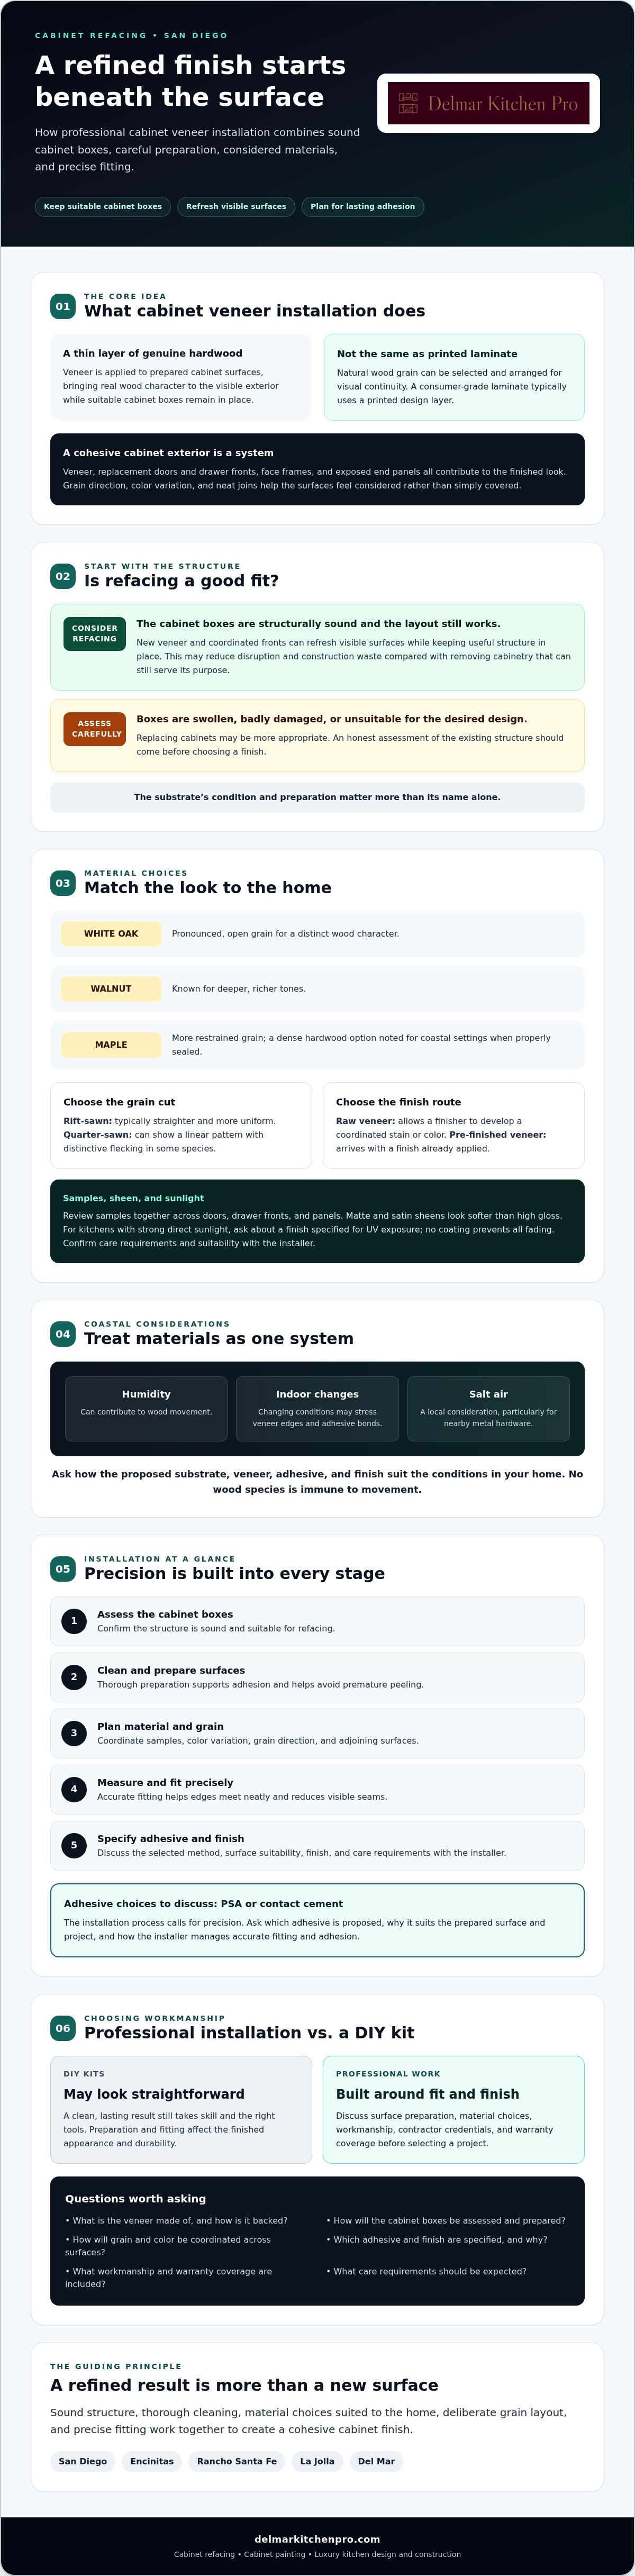
Cabinet veneer installation applies a thin layer of genuine hardwood to prepared cabinet surfaces. It gives the visible exterior the character of real wood while allowing suitable cabinet boxes to remain in place. Wood veneer is made by slicing or peeling wood into thin sheets. Unlike a consumer-grade laminate, which typically uses a printed design layer, veneer has natural wood grain that can be selected and arranged for visual continuity.
“Architectural veneer” describes veneer selected and applied for finished interior surfaces, but product quality and construction can vary. Ask what the veneer is made of, how it is backed, and what finish is specified. A professional should explain how those choices suit the cabinet surfaces and the overall design. The goal is not simply to cover old cabinets. It is to create a considered finish that works with the doors, drawer fronts, and room.
The Anatomy of a Veneered Cabinet
The substrate is the surface beneath the veneer. Cabinet boxes may be made from plywood, MDF, or other materials. Successful adhesion depends on a sound, clean, properly prepared surface, not the material name alone. A face frame is the visible framework around the cabinet opening, while end panels cover exposed cabinet sides. Each surface needs accurate measuring and fitting so edges meet neatly and the grain reads consistently.
Veneer is often coordinated with replacement door and drawer fronts to bring the cabinet exterior together. Grain direction, color variation, and the way adjoining surfaces meet all affect the finished look. Matching does not mean every panel will look identical. Natural wood varies, so material selection and layout help create a balanced, intentional appearance.
Refacing vs. Replacing: The Luxury Perspective
Refacing may suit a kitchen when the cabinet boxes are structurally sound and the layout still works for the household. If boxes are swollen, badly damaged, or unsuitable for the desired design, replacing them may be more appropriate. An honest assessment of the existing structure comes first.
Keeping suitable boxes avoids removing cabinetry that can still serve its purpose. That can reduce construction waste and preserve useful structure, while new veneer and coordinated fronts refresh the visible surfaces. It may also offer a cost-conscious route to a high-end appearance compared with replacing every cabinet, though the right choice depends on the condition and scope of the kitchen. Delmar Kitchen Pro provides cabinet refacing and painting for homeowners in San Diego, Encinitas, Rancho Santa Fe, La Jolla, and Del Mar, with material and finish choices shaped around the home and project.
Selecting Premium Materials for San Diego Coastal Homes
In coastal San Diego, material selection is part of the durability plan. Humidity and changing indoor conditions can contribute to wood movement, which may stress veneer edges and adhesive bonds. Salt air is another local consideration, particularly for nearby metal hardware. A careful cabinet veneer installation considers the room’s conditions, cabinet substrate, veneer, and finish as one system. Ask how the proposed materials suit your home rather than choosing by appearance alone.
White oak and walnut offer distinct looks: oak has a pronounced, open grain, while walnut is known for deeper, richer tones. Maple has a more restrained grain and, when properly sealed, is a dense hardwood option noted for coastal settings. No species is immune to movement. Stable cabinet construction and appropriate finishing matter as much as the wood choice. The Architectural Woodwork Standards offer a professional reference for discussing quality expectations for woodwork and fabrication.
Choose the Cut and Finish with Care
Rift-sawn veneer typically shows a straighter, more uniform grain. Quarter-sawn veneer can show a linear pattern with distinctive flecking in some species. Both can look refined. The right choice depends on the desired character and how the grain will carry across doors, drawer fronts, and panels. Review samples together, not in isolation.
Raw veneer allows a finisher to develop a coordinated stain or color, while pre-finished veneer arrives with a finish already applied. The suitable option depends on the project and the level of color matching required. Matte and satin sheens offer a softer appearance than high gloss. Kitchens with strong direct sunlight may benefit from a finish specified for UV exposure, but no coating prevents all fading. Confirm the finish’s care requirements and suitability with the installer.
Plan for a Furniture-Grade Result
A seamless look comes from deliberate grain layout. The installer can review how veneer sheets will be sequenced across adjacent surfaces so visible grain transitions feel considered rather than random. Natural wood varies in tone and pattern, so the aim is visual balance, not identical panels.
For painted cabinetry, moisture-resistant MDF may be appropriate. For cabinet construction, plywood is generally more moisture-resistant and structurally stable than particle board. The substrate still needs to be sound and properly prepared. In homes around Del Mar and Encinitas, discuss sun exposure, ventilation, and finish maintenance before settling on materials. If you’re comparing options for a San Diego kitchen, explore cabinet refacing and material options with Delmar Kitchen Pro.
Structural Integrity: Preparing Cabinet Boxes for Veneer
A clean veneer job starts with an honest inspection of the cabinet boxes. Veneer can refresh sound cabinetry, but it will not correct loose joints, sagging shelves, swollen panels, or a cabinet run that is out of alignment. Those problems need attention before a new surface is applied. Otherwise, movement or unevenness can show through the finish or put stress on veneer seams.
Look for soft or crumbly areas, persistent swelling, dark staining near sinks, and panels that flex when pressed. These can point to water damage or deterioration. The issue may be repairable, but damaged material should not simply be covered. A professional assessment helps determine whether the boxes can support refacing or whether replacement is the sounder choice.
Check the Surface and Structure
Existing paint, varnish, wax, grease, and cleaning-product residue can interfere with adhesion. A qualified installer checks the finish and tests compatibility with the intended adhesive and veneer system. Loose joints and frames are repaired or reinforced as needed, and doors and openings are checked for alignment. Correcting these issues first helps the finished surfaces meet cleanly.
Prepare for a Reliable Bond
Preparation is deliberate, not simply a quick pass with sandpaper. The surface is cleaned and degreased with products appropriate for the cabinet material, then allowed to dry fully. Any remaining loose finish is removed, and the substrate is sanded to create a consistent bonding surface without gouges or ridges. The correct sanding grit depends on the substrate and adhesive instructions, so one grit should not be treated as right for every cabinet.
Small dents, open grain, and shallow imperfections may need filling and leveling. The goal is a smooth, stable surface, not a thick cover-up. Dust must also be removed before adhesive is applied, since particles can disrupt contact between the veneer and cabinet face. For an overview of application considerations, see this specialist guide to Veneer Application.
- Inspect: Identify swelling, rot, loose joints, and misaligned frames.
- Clean: Remove grease, wax, and residue without leaving cleaner behind.
- Level: Repair and smooth defects, then remove sanding dust.
- Verify: Confirm the substrate and adhesive system are compatible before proceeding.
This groundwork makes cabinet veneer installation more dependable. Precision at the surface matters, but so does the structure beneath it. If the boxes are not sound, clean, and aligned, the veneer cannot deliver a consistent, lasting finish.
The Installation Process: PSA vs. Contact Cement
The adhesive method affects how veneer is positioned and bonded. Pressure-sensitive adhesive (PSA) comes pre-applied, usually with a release liner. It allows some adjustment before firm pressure is applied, making placement more forgiving. Contact cement is applied to both the veneer and the prepared cabinet surface. Once the coated surfaces meet, the bond forms quickly, so precise alignment matters and repositioning is difficult.
Neither method removes the need for careful preparation or even pressure. The installer selects an adhesive system suited to the veneer and substrate, then follows its application requirements. During cabinet veneer installation, small lapses can leave bubbles, weak spots, or edges that lift. Clean surfaces, accurate placement, and consistent pressure are essential.
How a Precise Installation Comes Together
The installer measures each surface and cuts the veneer slightly oversized. That extra material allows the piece to be positioned carefully, then trimmed flush to the cabinet edge. Scribing, or marking a cut to follow the exact shape of a surface, helps create close-fitting seams around corners and adjoining panels.
After placement, a J-roller or veneer scraper applies firm, even pressure across the surface, pushing out air and supporting full adhesive contact. The veneer is trimmed with suitable cutting tools. A flush-trim router may be used where appropriate, followed by careful filing at exposed edges. Edge banding covers vulnerable edges and helps the veneer read as a finished, continuous surface. It is a small detail with a large effect on the final appearance.
Details That Protect the Finish
- Dust: Fine particles trapped beneath veneer can create raised spots, often called telegraphing, and interrupt a smooth finish.
- Pressure: Uneven or insufficient pressure can leave areas poorly bonded. Use of a roller or scraper should follow the adhesive and veneer requirements.
- Grain direction: Misaligned grain across doors, drawer fronts, and panels can break the visual flow. Plan the layout before cutting.
- Edges: Inaccurate trimming or poorly fitted edge banding can leave gaps, roughness, or exposed substrate.
These are reasons to assess workmanship, not to assume every adhesive or veneer behaves the same way. Ask the installer which bonding method is planned, how pressure and trimming will be handled, and how exposed edges will be finished. For help planning a precise cabinet refacing project, discuss your kitchen refacing options with Delmar Kitchen Pro.
Why Professional Installation Trumps DIY Veneer Kits
Veneer can look simple in a sample. A full kitchen is less forgiving. Cabinet faces, corners, edges, and grain direction all need to work together, and a mistake on one panel can stand out across the room. Professional cabinet veneer installation brings trained judgment and purpose-built tools to the work, while helping homeowners avoid the learning curve and potential rework of a DIY approach.
Professional trimming tools can make cleaner, more consistent cuts than basic hand tools, especially around exposed edges and adjoining surfaces. Experience also helps an installer spot problems before they are hidden beneath a new finish, coordinate the sequence of work, and maintain a consistent appearance from cabinet to cabinet. Delmar Kitchen Pro brings more than 25 years of industry experience to kitchen projects in San Diego, Encinitas, Rancho Santa Fe, La Jolla, and Del Mar.
Credentials, Workmanship, and Warranty Questions
For a San Diego project, verify the contractor’s credentials and confirm who is responsible for the work. Delmar Kitchen Pro is a licensed contractor, License #892702. Licensing is one useful check, but it does not replace clear project details. Ask what preparation and bonding methods are planned, what work is included, and what written warranty terms apply.
There is no responsible way to promise that every veneer installation will last a set number of years. Longevity depends on the cabinet substrate, preparation, materials, adhesive, installation, and care. A professional process can reduce common risks, but a written warranty should state its coverage, exclusions, and duration. Get those terms before work begins rather than relying on a general claim.
A More Managed Kitchen Update
Refacing can preserve sound cabinet boxes and avoid the disruption of removing all existing cabinetry. The exact work varies by kitchen, so ask how the project will be staged and what to expect in the room during installation. A clear plan for materials, sequencing, and household access can make the process feel more predictable without promising that daily routines will be untouched.
Delmar Kitchen Pro serves homeowners in San Diego, including La Jolla and Rancho Santa Fe, with cabinet refacing and painting. Depending on the project, homeowners can also discuss how cabinets and counter options may fit into a broader kitchen update. The goal is a cohesive finish and an informed decision, not a one-size-fits-all solution.
For a considered plan for your kitchen, explore professional cabinet refacing with Delmar Kitchen Pro.
Give Your Kitchen a Refined New Finish
Cabinet veneer installation can refresh a kitchen without replacing sound cabinet boxes. The result depends on the details: choosing materials suited to the home, preparing surfaces carefully, and applying veneer with precise alignment and pressure. A professional assessment also helps determine whether refacing is right for your existing cabinetry.
For homeowners in San Diego, Encinitas, Rancho Santa Fe, La Jolla, and Del Mar, Delmar Kitchen Pro offers cabinet refacing and painting as part of its kitchen work. The company also provides luxury kitchen design and construction, with cabinet and counter options for projects that call for a broader update. Clear communication about materials, project scope, and warranty terms can help you make an informed decision.
If you’re ready to explore a considered update for your kitchen, request your luxury kitchen consultation in San Diego. A fresh, carefully planned finish can bring new character to the space you already call home.
Frequently Asked Questions
How long does cabinet veneer installation typically take?
There is no single timeline for cabinet veneer installation. It depends on the kitchen’s size, cabinet condition, material choices, and scope of work. Surface repairs, detailed grain matching, and the number of doors and panels can all affect the schedule. Ask for a project-specific timeline after the cabinets have been assessed. For homes in San Diego, Encinitas, or nearby communities, clarify how the work will be staged and what access you’ll have to the kitchen.
Will the veneer peel off if it gets wet or near the stove?
Properly selected and installed veneer should not peel from ordinary kitchen use, but it is not waterproof. Standing water, repeated steam, heat, or a weak adhesive bond can damage the finish or affect the bond over time. Wipe up spills promptly and avoid directing heat or steam at cabinet surfaces. Ask the installer how the chosen veneer and finish suit your kitchen’s conditions, including areas near the sink and stove.
Can you install veneer over painted or finished cabinets?
Often, but the existing surface needs to be assessed first. Paint, varnish, wax, grease, or a loose finish may interfere with adhesion, so the surface may need cleaning, sanding, or removal of unstable coatings. The installer should check that the cabinet material is sound and that the adhesive system is compatible. Do not assume veneer can be applied directly over any painted or finished cabinet. Preparation depends on what is there.
Is cabinet veneer as durable as solid wood?
Veneer is genuine wood, but it is a thin surface layer bonded to a substrate, while solid wood is wood throughout. A well-made veneered cabinet can provide a durable, authentic wood appearance, but it responds differently to damage and refinishing. Durability depends on the substrate, veneer, adhesive, finish, and care. Ask what repairs are possible and what the written warranty covers before choosing veneer or solid wood for your San Diego kitchen.
What is the difference between refacing and resurfacing?
The terms are sometimes used interchangeably, so confirm exactly what a contractor includes. Refacing generally updates visible cabinet surfaces and may include new door and drawer fronts while keeping suitable cabinet boxes. Resurfacing can refer more broadly to renewing an existing surface, such as applying a new finish. In San Diego, request a written scope that specifies which cabinet parts will be covered, replaced, painted, or left unchanged.
How do I clean and maintain my new veneered cabinets?
Use a soft, lightly damp cloth and dry the surface after cleaning. For routine marks, follow the care instructions for the specific finish. Avoid abrasive pads, harsh cleaners, and leaving water pooled on edges or seams. Wipe spills promptly, especially near the sink, and use ventilation to limit lingering moisture and cooking residue. Ask your installer for finish-specific care guidance, since recommendations can vary by coating and material.
Can I change the wood species of my cabinets through veneering?
Yes, veneer can change the visible wood species and appearance of suitable cabinet surfaces. The cabinet boxes must be structurally sound, and the selected veneer needs to work with the substrate and finish plan. For a cohesive result, coordinate the grain and color across exposed panels, doors, and drawer fronts. A cabinet refacing professional serving San Diego, Encinitas, Rancho Santa Fe, La Jolla, or Del Mar can assess whether your existing cabinetry is a good candidate and discuss available material options.
Does cabinet refacing increase the resale value of my home?
It may improve a kitchen’s appearance and buyer appeal, but no specific increase in resale value can be promised. The result depends on the home, local market, quality of the work, and whether the refreshed cabinets suit the rest of the kitchen. Refacing can be a way to update sound cabinetry without replacing every box. For a San Diego home, weigh the project against your plans and ask for a clear scope before proceeding.


